If you can insert something into a slot, you can install an M.2 drive—it’s that easy!
There are two main types of M.2 SSDs: those based on the SATA interface and those that support PCIe-based NVMe.
NVMe SSDs utilize the super-fast PCIe bus, allowing them to reach much higher speeds than anything based on SATA technology.
For most people, like gamers and everyday PC users, SATA drives are fast enough. But if you’re a high-performance user, video editor, or simply want the absolute fastest file transfer speeds, NVMe is the way to go.
This guide will walk you through installing an NVMe or SATA M.2 SSD in your PC, with a focus on popular models like the 1TB NVMe SSD, 2TB NVMe SSD, and others.
What is an M.2 SSD?
M.2 SSDs come in two main types:
- SATA-based
- NVMe-based

SATA M.2 drives use the older, slower SATA interface, while NVMe SSDs use the PCIe bus, offering significantly faster read and write speeds. High-performance users often choose NVMe for tasks that require rapid file transfers.
Tools You’ll Need
– A small Phillips-head screwdriver
– Anti-static wrist strap (recommended)
Step 1: Check Your Motherboard Compatibility
Before you buy a 1TB NVMe SSD, 2TB NVMe SSD, or even a 4TB NVMe SSD, it’s essential to ensure that your motherboard supports the specific M.2 drive you want to install.
– Locate the M.2 Slot: Refer to your motherboard manual to find the exact location of the M.2 slot. Some motherboards have multiple slots, each supporting different drive types.
– Determine the Drive Type: Check if the slot supports PCIe (for NVMe) or SATA-based M.2 drives.
Step 2: Preparing for Installation
1. Power Down and Unplug: Ensure your PC is completely powered off and unplugged.
2. Discharge Static Electricity: Wear an anti-static wrist strap or touch a metal surface to prevent static damage.
Step 3: Installing the M.2 SSD
1. Remove the M.2 Slot Cover: If your motherboard has a heatsink covering the M.2 slot, unscrew it to expose the slot.
2. Insert the M.2 SSD: Insert the drive at a 30-degree angle into the slot. Gently wiggle it into place if necessary. It’s normal for the drive to stick up slightly.
3. Secure the SSD: Use either a tool-less clip or a small screw to secure the drive to the motherboard.
Step 4: Reattach the Heatsink
If your motherboard has a heatsink, ensure you remove the protective plastic from the thermal pad. Reattach the heatsink over the SSD, securing it with screws.
Step 5: Initialize and Format the SSD in Windows
Once your M.2 SSD is physically installed, you’ll need to set it up in Windows.
1. Open Disk Management: Type “Disk Management” in the Windows search bar and select “Create and format hard disk partitions.”
2. Initialize the SSD: Right-click the unallocated space on your new drive and select “New Simple Volume.”
3. Format the SSD: Follow the prompts to format the drive, giving it a name and assigning a drive letter.
Installing an NVMe SSD Without an M.2 Slot
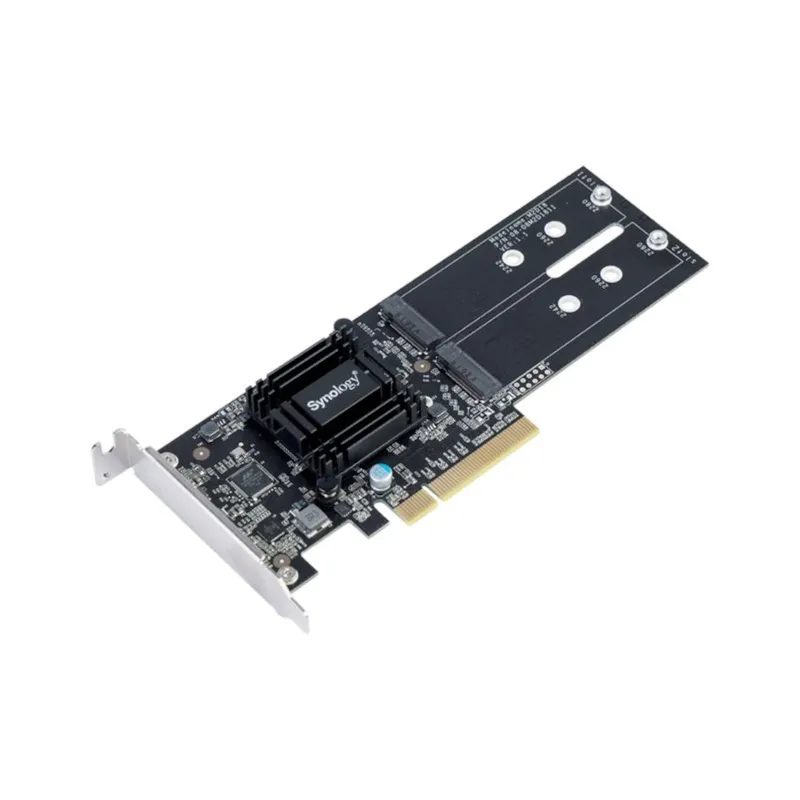
If your PC doesn’t have an M.2 slot, you can still install an NVMe SSD using a PCIe adapter card. Simply mount the NVMe SSD onto the adapter and insert it into a free PCIe slot on your motherboard.
How to Install an M.2 SSD in Windows 10 and 11

The installation process for an M.2 SSD is almost identical in both Windows 10 and 11. Once the drive is installed, the steps to initialize and format it are the same in both operating systems.
Here’s a step-by-step guide to installing an M.2 SSD and setting it up in both Windows 10 and Windows 11. The process is straightforward, and the steps for initializing and formatting the drive are the same for both operating systems.
Step 1: Physically Install the M.2 SSD
1. Power Off Your PC: Make sure your computer is completely powered off and unplugged.
2. Locate the M.2 Slot: Open your PC case and identify the M.2 slot on your motherboard. It might be under a heatsink or located near the RAM slots.
3. Insert the SSD: Slide the M.2 SSD into the slot at a 30-degree angle until it’s securely in place.
4. Secure the SSD: Use the provided screw or tool-less mounting clip to fasten the SSD to the motherboard.
5. Replace the Heatsink (if applicable): Reattach the heatsink if your motherboard includes one, ensuring that the thermal pad makes contact with the SSD.
Step 2: Boot Up Your PC and Access Disk Management
Once the physical installation is complete, power on your PC and follow these steps to initialize and format your new SSD:
1. Open Disk Management:
– In Windows 10 or Windows 11, right-click the Start menu and select “Disk Management” from the list.
2. Initialize the SSD:
– A window will prompt you to initialize the new drive. Select the GPT (GUID Partition Table) option and click “OK.”
3. Create a New Simple Volume:
– Right-click on the unallocated space of your new SSD and select “New Simple Volume.”
4. Follow the Wizard:
– The wizard will guide you through the process of assigning a drive letter, choosing the file system (NTFS is recommended), and formatting the drive.
Step 3: Verifying the SSD in Windows Explorer
Once formatted, your new M.2 SSD should appear in Windows Explorer, ready for use. This process is the same in both Windows 10 and Windows 11, ensuring a seamless setup no matter which operating system you are using.
With these steps, your M.2 SSD installation is complete, and your PC is ready to take advantage of the increased storage speed and performance.
Installing an NVMe SSD in a SATA Slot
While SATA and NVMe slots are different, some motherboards come with hybrid slots that can accommodate both. Make sure your motherboard supports this feature before attempting the installation.
Why Choose Hyrican SSDs and Memory?
Hyrican SSDs and memory options, like Hyrican RAM and Hyrican memory modules, offer a reliable upgrade path for PC builders. Known for their quality and performance, these components are excellent choices for both gaming rigs and everyday PCs.

Hyrican Striker 32GB/2TB SSD $4,513.50
Installing an NVMe or SATA M.2 SSD is a straightforward process that can significantly boost your PC’s performance. Whether you’re upgrading to a 1TB NVMe SSD, 2TB NVMe SSD, or even a 4TB NVMe SSD, following these steps will ensure a smooth installation.
For high-performance storage solutions, consider Hyrican SSDs for your next upgrade. They offer excellent performance, reliability, and value for both professionals and gamers.
If you found this guide helpful, feel free to share it and let us know your thoughts in the comments!

